How to install Apache maven on windows system
Introduction
1. Maven is a build automation tool for Java projects.
2. Maven is a project management and comprehension tool.
3. Using maven we can build and deploy the applications into the server.
4.Using maven generating the documents for java projects.
5. In apache ant, some disadvantages are there so maven comes into existence to rectify all the disadvantages, in Apache and we can manually add jar files but in maven, all the dependency are added in pom.xml file based on the XML file all jar file is downloaded automatically.
Installation
1. Before installing maven you need to install java. For Java Download from https://www.java.com/en/download/2. Then install the maven from https://ant.apache.org/bindownload.cgi.
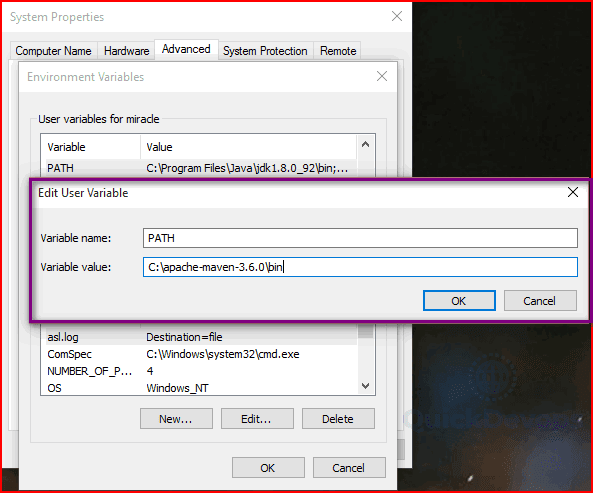
3. Unzip the folder and copied into your desired location and set the path in environment variables. for setting the path to follow the below steps.
- Go to environment variables and set the path of ant binary files.
- Then add the new user variable name as path and variable value as (path to the bin folder of maven).

4. you have successfully installed ant on your system, whether the maven is successfully installed or not, to check the below command: mvn -v
open the command prompt and type the mvn -v then you will show the output message like maven version installed on your system.


0 Response to "How to install Apache maven on windows system"
Post a Comment